The first stage of the construction of the chair was to cut the section to the required sizes along with the angles, these were all derived from reading the technical drawings.
Once the sections had been cut and the burs removed the top, rear and front frame sections were tacked into position with the TIG welder.
Once the sections are tacked into place the sections where these parts need to be welded they then are and the timber housing are then part of the frame.
The next stage of the built is to construct the 'V' shaped face section for the front face of the section shown above and the rear face for the section shown below.
Once these 'V' sections have been attached and tacked most of the welding can be done. The large welds take time due to the stop and start method which i used to prevent the frame from warping excessively.
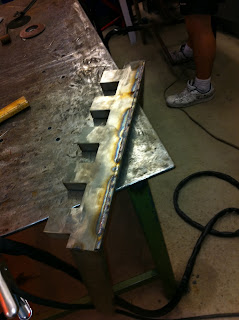
Note the tack welds along the 'V' section of the rear legs and the close spaces along the length of the strip, this prevents the 'V' section from warping and pulling away from the RHS as it is welded.
This image shows the process of welding along the length of the 'V' section. The burn marks show the sections where the weld has been created and the spaces between show tack burns.
The next stage is to cut a section of the corners out to put in the radius corners, the corners are marked 25mm in from the edge and a cut is made along that line. A curved section is then cut out between these two initial cuts, creating a void for quarter section of the 50mm pipe to be tacked into place. once tacked the excess material is removed and the welds are completed.
The next stage sees the finishing of the frame sections, the welds are ground back, if holes are found they are re-welded and ground back again, the surface is then finished with a sanding disc to smooth off the surface. The next stage is to remove the burn marks from the surfaces that need no finishing (welds), this requires the use of an acid called pickling paste, the paste is applied to the weld and surrounding area eats the burn marks and is washed off and repeated if required. The final stage of the finishing takes place now, I use a special scotch brite wheel on a straight grinder which helps to remove the harsh marks of the the sanding wheel and creates a brushed polish look on the surface of the stainless.


No comments:
Post a Comment